
How To Organize and Edit 3,000+ Travel Photos
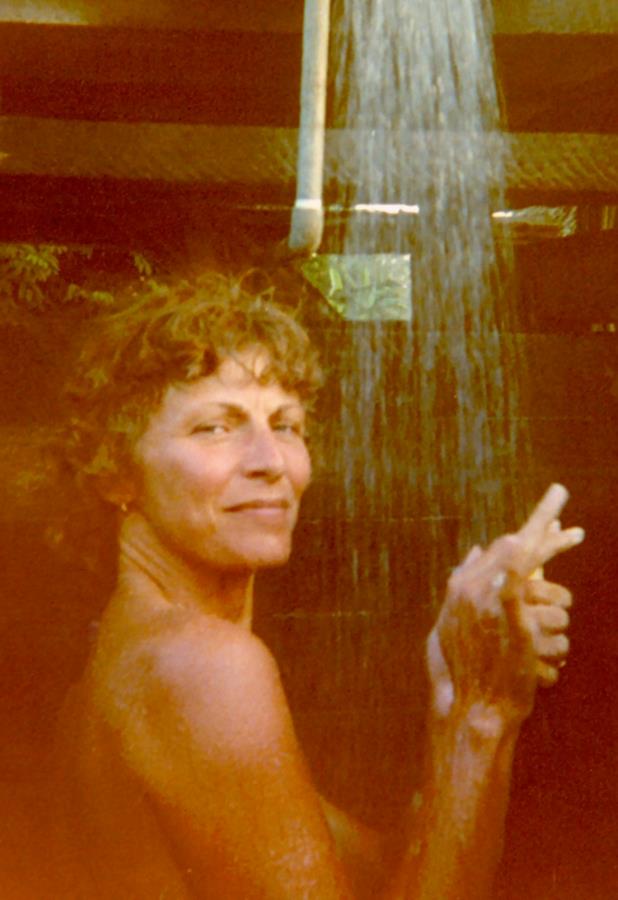 Traveling is fabulous – you’ll get no argument from me on that score. And thank GOODNESS for my many travel pics over the years. While I can still vividly recall sipping that tiny demitasse cup of espresso at a shady table on the Piazza San Marco in Venice in 1979, along with the cooling trickle of cold water in that outdoor shower amid the jungle in Belize back in the 80’s – with so many places and travel experiences now under my life-long travelin’ belt, my dodderin’ brain tends to dim on the details. So a stray photo of such long ago travel adventures is mighty precious indeed.
Then again, there’s ever that daunting post-trip chore of organizing and editing all those snapshots. And for a trip like the 44 day/8 country marathon I just finished, suffice my 3,555 raw images of Germany, Austria, Slovenia, Croatia, Bosnia-Herzegovina, Montenegro, Turkey and Greece…
Well let’s just say, the task looms more than a bit overwhelming.
Ah but I love nothing (save the travel itself) if not the passive joy of slowly wading through the digital memories of my many recent adventures – lingering on snapshots of the food I ate, the places I saw, and the amazing experiences I enjoyed. And that’s exactly what I’ve been doing since my return – reliving those many moments through my – did I mention? – three THOUSAND plus images.
And no doubt I’m not alone with being faced with such a monumental (albeit tenderly nostalgic) chore. Perhaps not 3k images in one fell swoop, but I’m betting you too have spent similar hours fiddling with your travel photos, dumping the losers, achingly evaluating the keepers, and organizing them into digital albums to share with friends, along with enjoying future walks-down-memory-lane.
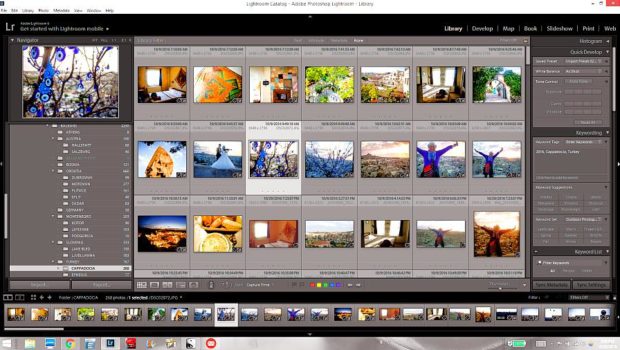
So I thought I might share just what my process is for organizing, sorting, curating, and editing my digital travel memories. It all begins with my bff photo editing software: Adobe Lightroom (and quick to add, nope, I’m not an affiliate, I just A.dore this software).
The truth is, I honestly don’t know what I would do without my beloved Lightroom. Luckily I bought it back when you could purchase it outright. Now I believe you can only get it via a monthly payment. I *loathe* “renting” software, but still, for about $10 per month Lightroom is oh so worth it.
So let’s get started with how I use Lightroom to make some sense out those 3k images, and wrestle them into a set of nice neat digital packages so that three years down the road – I can FIND them and USE them however I like. There’s a TON of great online how-to videos on every blessed aspect of the Lightroom software, but today I’m just going to step through the process I use to upload, organize and curate my images.
1. Transfer images from camera to my laptop via the “Import” function in Lightroom – destination: folder BALKANS
2. Ditto transfer images from my phone – destination: subfolder under BALKANS: Balkans Phone
Note: re: the latter “Balkans Phone” pics – as the size/format of my phone pics are of course, far different than those images from my camera, I like to keep them separated by assigning a “phone” keyword to them. Later when I go to use them in a TL blog post, etc. I’ll need to resize them differently, so best to differentiate them right from the get-go. Note that other keywords that I use will be added after I’ve completed my “culling” (read: slaughter and decimate) process (detailed below).
Now then, some like to dive in at this point and delete the obvious disaster images. But with 3k+ images from 8 different countries, I prefer to start my edit by moving them (WITHIN LIGHTROOM!) into various country/locale folders. Thus…
3. Under the main BALKANS folder, I create folders for each country (e.g. GERMANY, AUSTRIA, SLOVENIA, CROATIA, BOSNIA, MONTENEGRO, TURKEY and GREECE). Then under each country, I also like to create folders for each locale I stayed in – I create these as subfolders under each country (e.g. Under the CROATIA folder, I create folders for Istria, Plitvice Lakes, Zadar, Split and Dubrovnik).
With my folders and subfolders complete, now it’s just a matter of clicking on the main BALKANS folder, selecting the images from each locale (Ctrl A on a PC), then dragging and dropping them into the folders I created.
Note: with such a boatload of images from so many countries, I find that jotting a dated itinerary of where I was each day, helps to locate the beginning and end of the photos from Hallstatt, Austria for example. The phone/camera will automatically date your pics as you snap them, and you can set Lightroom to display the date meta data on each pic as you view them in the grid view.
4. I start moving the images first from the Balkans Phone folder. They’re already marked by the “phone” keyword, so I’ll later be able to filter them for editing and exporting. Once all the phone pics have been transferred to their respective country/locale folders, the Balkans Phone folder will be empty, so I can delete it (again, ALWAYS WITHIN LIGHTROOM!)
5. Then I drag ‘n drop all the camera images in the main BALKANS folder into their respective country/locale folders.
THE FIRST CULL:
6. Making it easy on myself – this first cull is a super quick run through of the pics in each locale, weeding out the obvious blurred images and the “what was I thinking?” disasters. Lightroom makes this super easy. By first setting the Caps Lock on, you can then go through each image in Library view, pressing “x” on any you want to delete – and Lightroom will mark the image as “rejected” and automatically advance to the next pic.
After I finish running through a batch of 270 images from say… Ljubljanna, x-ing/rejecting the losers, in Lightroom I can then filter for only the rejecteds and delete all in one click.
Note: Speaking of “blurred images” – my number one photo tip (for both camera and especially phone): Set the camera on “timer”. YMMV but on both my Sony MX and my Galaxy S4, the minimum timer setting is 2 seconds. I keep both set that way for general shooting, as that momentary pause after pressing the shutter ensures that the image won’t be blurred due to movement of the camera as I press the shutter. This is especially helpful on smartphones as they’re so light that even the smallest jiggle can blur your image.
For the batch of 3,555 total images from my entire Balkans trip, my first cull run resulted in 1,234 deletions! That’s more than a THIRD of all the pics that I dumped into oblivion. Still… that left quite a daunting amount of pics to sort through: 2,321 to be exact.
Obviously I have quite a lot of work still ahead determining just which of the remaining 2k+ images will end up in a TL blog post, but at this point in my photo editing process, I consider them all “keepers” and it’s time to start key-wording and renaming them.
7. Keywording: I try to keep my image keyword system pretty simple. I assign a year date for all my images, and for my travel pics, I keyword both the country, and the locale.
So for this batch, I first select ALL the remaining pics in the BALKANS folder and add the keyword “2016” to all 2,321 images. Next I select all the images in each country folder (e.g. GERMANY, SLOVENIA, etc.) and assign a country name keyword. Next I open the locale subfolders – selecting all the images within the subfolder say… Salzburg or Cappadocia or Lake Bled, and assigning a locale keyword – Salzburg, Cappadocia, etc. Lastly, I assign various other keywords like “people”, “children”, “food”, “sunset”, “panorama”, etc.
8. Now it’s time to rename each locale batch via a sequenced naming system: first the 4 digit year, followed directly by a two digit month; then a dash and a 3 letter country code; another dash plus the locale; and finally another dash preceding the automated sequence number. Here’s an example for one batch of my Balkans pics:
201610-TKY-Cappadocia-01 ( 02, 03, etc.)
Sounds more complicated than it is, and I have a preset naming template that makes it even easier. YMMV regarding what naming convention you choose to use, but for me, this method does the job. But no matter what naming convention you decide on – be consistent – use it across ALL your images.
9. If I’m not too blearly-eyed at this point, I begin the more serious curating process – going through the “keepers” and setting a flag for those that I expect to use in a TL blog post some day. These I try to keep to no more than a dozen or two for each locale or activity that I plan to write about. And later – when I go to actually write the post, I’ll further narrow them down if necessary.
In short, out of more than 3,000 images, I likely will only actually use about 500 for TL posts. These will be the ones that help me to tell the story, and I will be among my best technically. Still, the REAL work begins when I edit these within an inch of their pixelated lives. Lightroom has amazingly powerful tools for cropping, lens corrections, color correcting, light enhancement, fine-tuning clarity, contrast, etc. as well as tweaking the saturation and luminance of individual colors, along with adding veiled vignettes in white or black, etc. etc. etc.
You see, I’m really a rather mediocre photographer, and rarely is a photo you see in one of my posts a “virgin” shot, posted straight out of the camera or phone. Luckily I ADORE fiddling with photo editing. With Lightroom, it’s astounding how you can turn a ho-hum image into something truly spectacular!
10. Oh, and for all those “keepers”? VERY.IMPORTANT. After setting all my keywords – I head straight to my Flickr account, and upload the originals to the cloud as a backup.
Now what about you – how do you handle the daunting task of organizing and editing your travel photos? Do you use Lightroom? Would you like to see more TL posts on the technicals of using Lightroom?
Did you find this post helpful?
Then you might want to subscribe to my email list so you’re sure to catch my next one.
(trust that I’ll not clog your precious inbox – I generally only post but once a week.)
About the Author
Dyanne Off-the-beaten-path travel is my passion,and I’ve always lived life “like-a-kid-in-a-candy-store” – eager to sample as many flavors as I can. Indeed, my life motto has long been: This ain’t a dress rehearsal, folks!
You might also like...
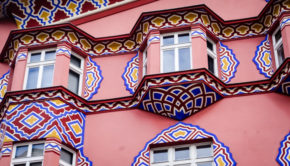
Skipping Through the Balkans: #3 Slovenia – Ljubljana →

When Was Your Last $200 Lunch? →
Nope, No Goofing-Off Here… →
 Off-the-beaten-path travel is my passion, and I’ve always lived life “like a kid in a candy store” – eager to sample as many flavors as I can. Indeed, my life motto has long been:


OMG, thank you TNL! I knew LR had a file name template. I couldn’t make it generate my pre-LR file naming convention. Learning of Custom Text and using it in the Library module (I thought it was only for Import and Export) changes all that. Now I can reconcile my 3 different file naming systems from my eras of pre photo editing, pre LR and LR. Who hoo!
I treat my locale folders differently. First 5 characters are MMDD-. When revisiting neglected, unedited photos months or years later, knowing the sequence I visited each locale jogs my memory of what I photographed.
As for the ‘phone’ tag, I take it you prefer that to using a metadata filter? I use the latter. However, given I change phones every 2-3 years, maybe a tag would work better for me. Hmm… I could use metadata to assign tag, then filter on the tag. Sure would make filtering easier.
Glad I could help with your custom text naming template, Bill. g-knows LR is sooo powerful, there’s still TONS of handy stuff I’ve yet to discover within it myself.
And yes – AIS, we each have our personal druthers when naming folders and/or images. Indeed, that’s one of the hallmarks of LR – you can customize it to suit your every whim.
As for my “phone” tag – yes, I too have had so many different phones over the years, I prefer to be able to filter for all of them in one fell swoop.
Our method tor organizing our pics is similar to yours Dyanne except we have the contributions of two photographers! Many times we duplicate each other but a lot of the time we end up with different perspectives and we can choose the better or keep both. We work on one computer and each of us edits, captions and geo-tags our own pics. One great help here is the handy pocket calendar I keep where I note where we were & sights we saw each date. Once the first edit is done, I combine the photos and then really get to the sorting. This goes slow a lot of times because I tend to drone myself into a dazed nap! 🙂 Finally, we upload our photos to DropBox and move them into folders by country.
I can predict a lot of hours of work but a lot of fun and good memories ahead for you! Enjoy!
Interesting Anita, I never considered that – with two shutter-happy photographers, there’s likely be far more duplicates to choose from. LOL, no doubt both a blessing and a curse at times, yes? 😉
And yes, I too keep a small (and sloppy!) analog trip diary jotting down various pricing, etc. details that I might use in a blog post, as well as notes on the people I meet and my feelings along the way. Very handy after 40+ days on the Trail!
What a whimp — I came back with 20,168 images after 77 days in Turkey! 🙂
You’ve got a pretty good system, and very close to mine. I suggest one additional change. On import, I rename my files. In my case, my wife and I both shoot, so the rename starts with “blj_” or “egj_” so we always know who shot any particular image.
The next part is more useful to you though. I use a template, with the second second being the date (YYYYMMDD), then a dash, followed by an index of 4 digits (allowing up to 9999 images per import). This way, the date is always automatically included in the file, and I can show them in the order they were created — all the way back to 2005 when I first started using that method. (an example — the first image from the Circo de Rusia we went to today is now named blj_20161030-0001)
The other difference I made is near the end for you. I do one more pass, in which I assign 3 stars (press the 3 key) for those that I think are worth the time to crop and edit further. This year, Evelyn has starting doing the 3-star, which spreads the work, but even if only done by one person, it helps that final edit stage.
I then go through and crop each 3-star, and do basic edits (using LR presets that I have created myself for a starting point). If I see a few that are very similar, I will drop all but one to 2-star, which takes it out of my filtered view (I am showing only 3+ stars), but reminds me that it is also a “maybe.” If I see one I really love, I bump it to 4-star.
When I have finished that stage, I then do a stage of deciding which go into a blog. I use ‘P’ (for Pick) to select 10 to 20 that I think fit a theme. I then filter with the Pick added, so I only see those. I then remove the P (click U for Unpick) until I have the very best of that theme. Blog work then proceeds.
The only other change I do, is that I download my photos daily, and try to keep the editing and blog writing within a few days of the traveling. Otherwise — as you say — it is just overwhelming. I found I wrote very little before I realized I needed to do it on the road, rather than waiting until the end.
Thanks for weighing in, Burt – yup, there’s as many different ways to go about wrestling with our pic passion as there are…. pics in our archives!
I favor waiting to rename after I’ve combined my camera and my phone pics, along with separating them by country/locale and dumping the losers – ‘cuz I like my sequencing to include such, and then there’s no gaps in the sequencing.
As noted, I also don’t bother with a multi-star system as I like to keep it simple. My “P” is akin to your 3-star rating I suppose, and to me – it’s either a good, useful pic or it isn’t. If I start to dither over 2 vs. 3 vs. 4 stars… lol, I’d never get through the process!
And while it’s great if you can take the time while on the Trail for such digital chores, I honestly would rather be out exploring/chatting up the locals than hunkered over a keyboard when I’m in a wondrous corner of the globe that I’ll likely not be in again in this lifetime. Well, that else… sleeping, as I’m tuckered out from all the exploring/chatting!